
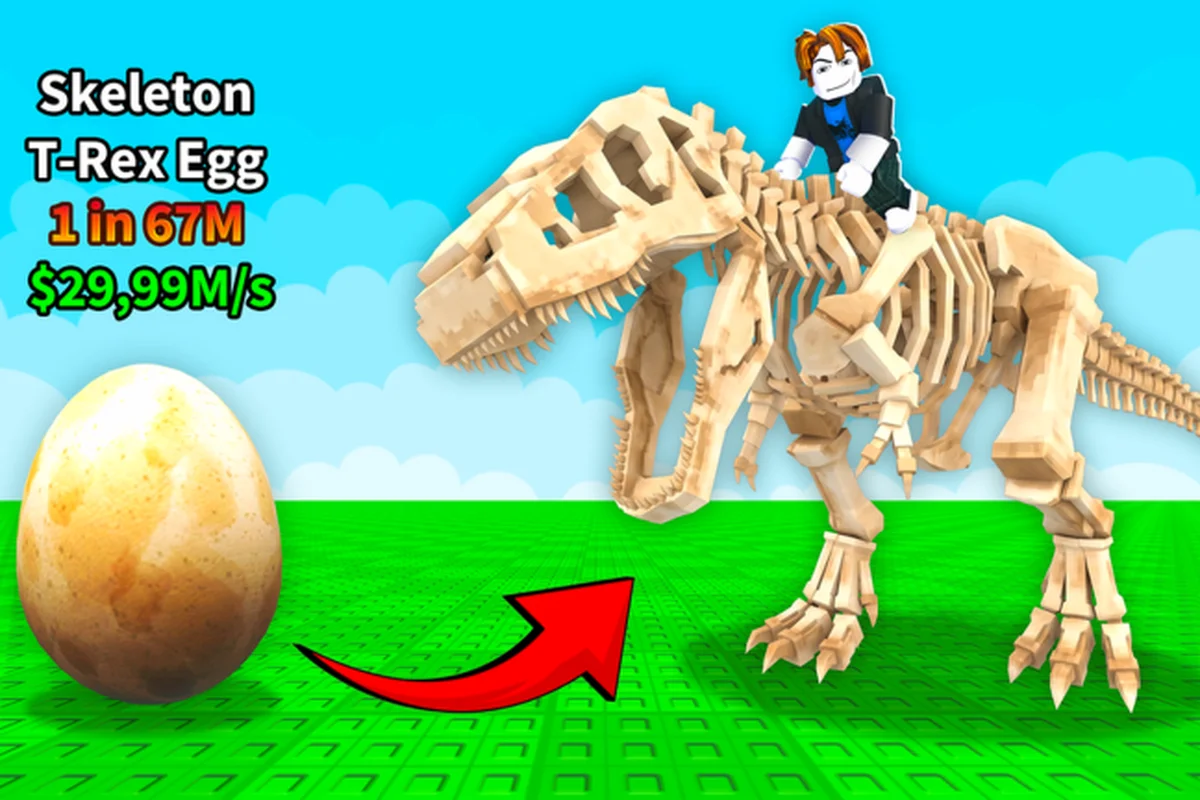
Ride a Dino runs on a tight loop: discover hidden eggs, hatch a dinosaur, ride it across the map to chase harder-to-find eggs, then mutate to push speed even higher. That last step is the one players hesitate over, and the hesitation usually comes from a bad assumption — that mutating is a paid transaction with a price tag you can weigh against a stat gain. The official material does not say that. What it says is narrower and more useful: mutating makes a dinosaur you already own go faster.
As of 2026-10-18, the developer page for Ride a Dino on Roblox publishes no species list, no rarity tier names, no mutation names, no numeric speed values, and no price for the mutation mechanic itself. It also publishes no developer products at all, and the only paid item in the catalogue is the Infinite Radar game pass, which is an egg locator rather than a mutation upgrade. So the mutate-or-skip question cannot honestly be answered with a cost-to-gain ratio, because no cost has ever been published. The decision this guide builds instead is a role test: which of your dinosaurs has earned the boost, and when.
Where Mutating Sits in the Loop
Mutation is the speed step that closes the ride-hatch-explore loop. According to the official page, players "mutate their dinosaurs to boost their speed even more," which makes the mechanic the main lever for reaching distant or hard-to-find eggs faster than other players on the same server. In a 6-player server cap environment, that speed advantage translates directly into egg control: whoever rides faster tends to collect first.
The reason the mutate question keeps coming up is that players assume it must be expensive, or gated, or limited. None of that is documented. The official description names mutation as one of five verbs in the loop and attaches exactly one effect to it — more speed for the dinosaur you mutate. Everything beyond that sentence is community assumption, and the assumptions have a habit of being wrong in both directions: some players skip mutation because they think it costs Robux, and others expect it to reshape their whole collection when the official claim is only about the mount in front of them.
What the Official Material Actually Confirms
Before you build any framework, separate what the developer has stated from what players have inferred, because the two are very different sizes. The table below is the entire evidentiary basis for this guide, and it is deliberately short: it lists only the things the official page has actually said, and flags the rest as unstated rather than filling the gaps with assumption.
| Question About Mutation | Official Status | What That Means for You |
|---|---|---|
| Does the mechanic exist? | Confirmed — the loop lists "Mutate your dinosaurs" | It is a real, intended part of progression |
| What does it do? | Confirmed — "boost their speed even more" | The payoff is speed on the dinosaur you mutate |
| Which dinosaur does it affect? | Confirmed by loop order — it applies to a mount you already ride | Mutate something you own and actually use |
| Does it cost Robux? | Not published anywhere | Cannot be weighed against a price |
| Does it change future hatches? | Not published | No documented effect on eggs you find later |
| Is there a maximum number of mutations? | Not published | No cap to plan around |
| Are there named mutation types? | Not published | Any named mutation list belongs to another game |
That last row is worth sitting with. Because the developer has never named a single mutation, any chart you find that lists "Rainbow," "Golden," or similar variants is describing a different Roblox experience, most likely one of the several similarly-named dinosaur games that share the "Ride a" naming pattern. Treating those lists as this game's content is the fastest way to make a bad decision about your own roster.
What Mutation Does Not Do
Three beliefs circulate widely and none of them is supported by the official page. First, that mutating a dinosaur makes future hatches rarer — the speed claim is the only effect stated, and rarity is described separately as a property of what you hatch, not of what you mutate. Second, that a mutated dinosaur passes something down to later eggs — there is no inheritance, breeding, or lineage mechanic in any official text. Third, that mutation draws on a paid currency — no price, no developer product, and no mutation purchase appears in the catalogue.
Why does the correction matter so much for the decision? Because each false belief pushes you toward a different mistake. If you think mutation improves future hatch luck, you will mutate a cheap dinosaur and be disappointed when the eggs behave the same. If you think it inherits, you will hoard a dinosaur rather than riding it now. If you think it costs Robux, you will pit a fictional price against a real speed gain. Strip those assumptions and the question becomes simple.
Ride a Dino Mutation Worth It: The Role Test
Whether a mutation is worth it comes down to one question you can answer without any published number: is this the dinosaur you are actually going to ride? A speed boost only pays off while you are mounted, so the value of a mutation is proportional to the time you spend on that specific dinosaur. That reframes the whole decision from a spending question into a riding question.
The Three Checks
Check one: do you ride it? A dinosaur you keep but never mount earns nothing from a speed boost. The mutation should go to the dinosaur that appears in your sessions most often, not the one with the rarest look.
Check two: is it already one of your fastest? Because mutation adds speed on top of whatever the dinosaur already does, the same boost feels larger in absolute terms on a faster base. Boosting your quickest mount widens the reach you already have; boosting a slow one produces a mount that is still, relatively speaking, slow.
Check three: will you still be riding it next week? A dinosaur you plan to replace the moment a better hatch arrives is a poor mutation target. The boost travels with the dinosaur, so if you abandon the dinosaur, you abandon the value.
If all three answers are yes, mutate. If any answer is no, keep hatching and revisit the decision later, because there is no documented deadline and no published reason to rush into it. The mechanic is not going anywhere, and a dinosaur you keep riding stays a valid candidate next session as long as you keep mounting it.
Mount Roles at a Glance
The role test is easier to run against a table than in your head, so the table below maps the four roles a dinosaur can occupy in your roster to a mutation decision and the reasoning behind it. Read it as a default recommendation rather than a rule: if your situation does not match any row, the underlying principle still applies, which is that value follows riding time.
| Mount Role | Mutate It? | Reasoning |
|---|---|---|
| Daily rider | Yes, first | It is mounted most often, so the speed boost converts to coverage every session |
| Fastest hatch | Yes | A boost on your quickest base widens the egg reach you already have |
| Fresh hatch under evaluation | Not yet | You do not know if it will survive your next few hatches, so wait |
| Collection slot | Usually no | A dinosaur kept for completion is rarely the one you ride, so the boost goes unused |
The ordering in that table is the practical answer to most "should I mutate" questions. When two dinosaurs both qualify, mutate the one you mount more often, because riding time is the only currency the mechanic actually converts. A slightly worse dinosaur that you ride every session will out-return a better one that sits in the collection untouched, which is why role beats stats in this decision.
Reading Mutation Effects Without Published Numbers
Because the developer publishes no percentages, multipliers, or stat values, you cannot audit a mutation on paper, and anyone who claims to have the numbers is working from personal observation rather than from published data. What you can do instead is read the two signals the game gives you the moment you are back on the dinosaur, both of which are comparative rather than absolute.
The Two Observable Signals
Raw speed signal. Mount the dinosaur before and after the mutation and compare how quickly it crosses a stretch of terrain you already know. This is the primary signal, because speed is the only effect the official page attributes to mutation. Pick a fixed landmark-to-landmark route so the comparison is about the dinosaur and not about the terrain.
Server mobility signal. Watch how often you reach an egg location before another player on the same 6-player server. This is a downstream read on the same speed change, and it is the one that matters competitively: if the mutation moves you into egg zones first, the boost is doing its job.
| Signal | How to Read It | What a Good Result Looks Like |
|---|---|---|
| Raw speed | Time a fixed route you have ridden before | The same route takes noticeably less time |
| Server mobility | Count contested eggs you reach first | You arrive before riders you previously tied with |
| Mount preference | Notice which dinosaur you default to | You keep choosing the mutated one over your others |
Community discussion describes mutation as carrying over between sessions rather than expiring, and nothing in the official material contradicts that, but the developer publishes no permanence guarantee. For the full caveat, the permanence breakdown covers what is and is not confirmed.
Applying Mutation: Sequencing Across Your Roster
Most riders eventually mutate several dinosaurs, and the order matters more than the individual choices. A sensible sequence follows the loop: establish a fast daily rider first, then extend reach, then tidy up the collection.
A Four-Stage Sequence
Stage one: mutate your daily rider. Give the boost to whichever dinosaur you mount by default, because that is the one whose speed you experience on every single route you run. This is the highest-frequency use case, so it returns value fastest, and it is also the easiest choice to defend: if you cannot name a dinosaur you ride more often than the rest, you have not found your first target yet.
Stage two: mutate your fastest hatch once it stabilizes. Wait until a dinosaur has survived a few sessions as your top pick, then boost it. Mutating a dinosaur still being evaluated is wasted effort if a better hatch replaces it the next day.
Stage three: mutate your reach extender. If one dinosaur exists specifically to cross long distances to distant eggs, boost it so the reach grows further still, because a mount used for the longest routes converts a speed gain into distance more directly than any other role in the roster.
Stage four: leave the collection alone. Dinosaurs held for completeness are not ridden, so the boost does not convert into anything, and that is the whole reason to stop here. A speed increase on a mount that never leaves the collection page is a change you will never feel, which makes it the clearest skip in the framework.
| Sequence Stage | Target | Why This Order |
|---|---|---|
| 1. Daily rider | The dinosaur you mount most | Highest riding time per session, so fastest return |
| 2. Fastest hatch | Your top pick once it stops changing | The base is already quick, so the added speed compounds on it |
| 3. Reach extender | The mount used for long-distance runs | Extends the egg radius the loop is built around |
| 4. Collection slots | Dinosaurs kept for completeness | Rarely ridden, so a boost has nowhere to convert |
Following the mutation guide for beginners before you commit to a sequence is the safest path if you are new to the mechanic. The beginner framing walks the same loop from the other end, starting with reading your roster before deciding which dinosaur has earned the boost.
Comparing Mutation Against Rarity-Only Progression
A player who never mutates can still climb by hatching more eggs and riding whatever comes out. The mutation path and the rarity-only path are two distinct progression strategies, and the right pick depends on how you spend a session rather than on any price.
| Progression Path | Commitment | Time Cost | Top-End Speed | Egg Reach |
|---|---|---|---|---|
| Mutation-heavy | High — you invest in specific mounts | Lower (fewer hatches needed) | Highest, because boosts stack on your best base | Widest, but capped by how fast your base already is |
| Balanced | Medium — you mutate the clear best and keep hatching | Medium | High | Wide |
| Rarity-only | Low — you keep hatching and riding whatever lands | High (many hatches needed) | Moderate | Limited to what the slowest mount can traverse |
| Egg-farming focus | Lowest — you never stop hunting | Highest | Variable | Depends which hatches you get |
The mutation-heavy path suits riders who already have a mount they love and want to push it as far as it will go. The rarity-only path suits riders who enjoy the hunt itself and would rather convert hours into a broader roster than into a single stronger mount. Most long-term players settle into the balanced path once they have one dinosaur they ride constantly. For a deeper look at the hunting half of the loop, the egg hunting guide covers how egg discovery and rarity interact with the mount you bring.
Decision Framework: Should You Mutate Right Now
When you are standing at the mutation prompt, the impulse is to treat the moment as scarce — as if the option might disappear. It will not, because nothing published describes a limited supply or an expiring offer. Run through this four-step framework before you commit:
-
Name the dinosaur's role in your roster. If it is your daily rider or your fastest hatch, mutation is justified. If it is under evaluation or kept only for completion, wait.
-
Confirm you will still ride it next week. The boost lives on the dinosaur, so a dinosaur you are about to replace is the wrong target no matter how it looks today.
-
Check the base. A mutation adds speed to what the dinosaur already does, so the strongest target is one that is already fast rather than one that needs rescuing.
-
Consider your server. On a quiet 6-player server, the reach you already have may be enough for every egg you want. On a full server with riders competing for the same nests, the extra speed is what decides who arrives first.
The framework deliberately puts role identification first, because the wrong answer to "should you mutate right now" almost always traces back to boosting a dinosaur that should have been left in the collection. Reading the mutation mechanics overview before a committing session short-circuits most of those mistakes.
Frequently Asked Questions
Should I mutate my first dinosaur right away?
Not necessarily. Mutate a dinosaur once you can see that it is the one you mount most often, because the boost only pays off while you are riding it. If your first hatch is already your default mount and nothing better has landed, it is a fine target; if you are still swapping every session, wait until your roster settles.
Are mutations permanent on the dinosaur I apply them to?
The official page publishes no permanence guarantee, though community reports describe the speed carrying over between sessions rather than wearing off. Treat the effect as durable in practice but unconfirmed by the developer, and check the permanence breakdown for the full caveat.
How do I know if a mutation result is good or bad?
The developer publishes no numbers, so judge it by feel against a route you already know. Re-ride a fixed stretch of terrain before and after the mutation and ask whether the dinosaur now covers it faster, and whether you are arriving at contested eggs ahead of riders you previously tied with. A noticeable improvement on either is a good result.
Is it better to mutate one mount or spread mutations across many?
Concentrate on the dinosaur you ride most often. The mechanic adds speed to the specific dinosaur you apply it to, so a boost on a mount you rarely use converts into nothing. A single well-chosen target you ride every session beats several boosts scattered across a roster you rotate through.
Does mutation affect the eggs I find afterward?
Nothing in the official material links mutation to future hatches. The stated effect is a speed boost for the dinosaur you mutate, and rarity is described as a property of what you hatch, not of what you mutate. A faster mount reaches harder-to-find eggs because it travels further, which is a difference in reach rather than in egg quality.