
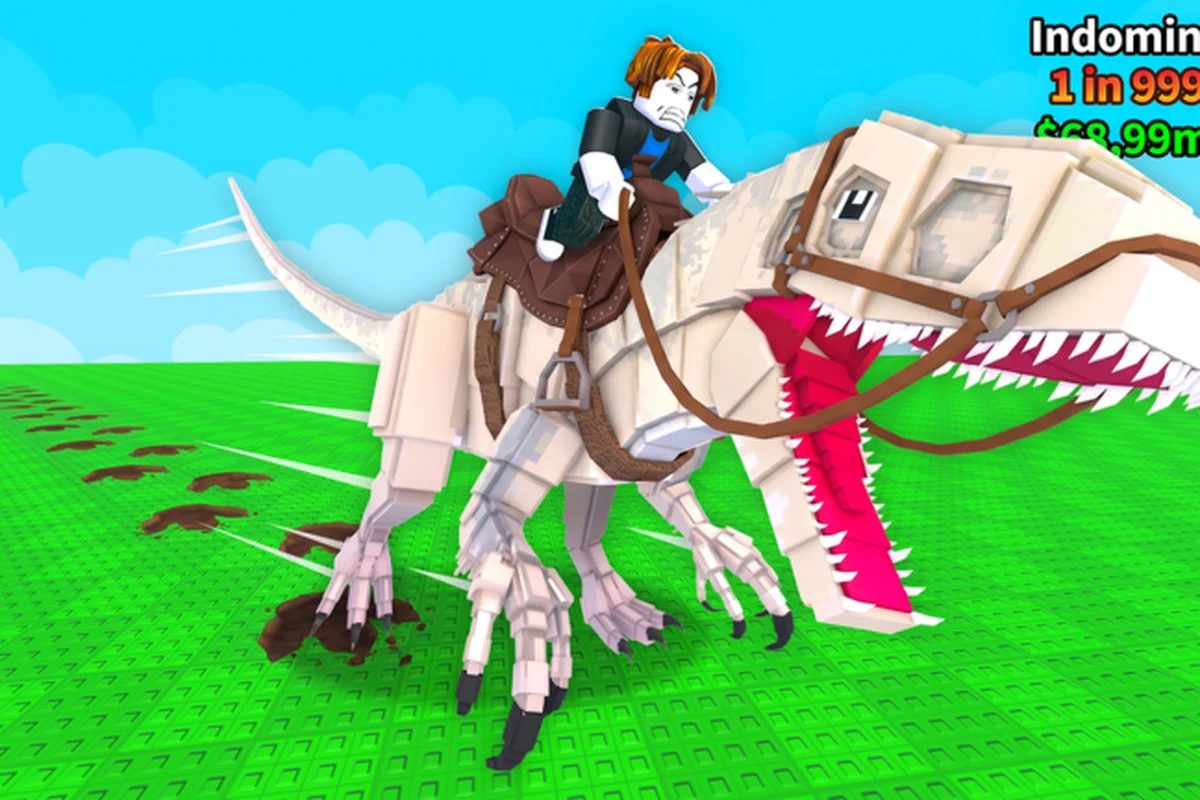
A solid Ride a Dino guide is the difference between wandering the map for twenty minutes and slotting straight into the egg-to-hatch loop that drives the whole game. Ride a Dino is a Roblox Simulation/Tycoon experience built around a tight cycle: roam the map to uncover concealed dino eggs, hatch dinos that come out quicker and rarer than the last, ride those dinos back out to reach harder-to-find eggs, mutate to push speed further, and collect rare specimens along the way. Because the developer has not published a species list, rarity tier names, mutation names, or numeric values, this walkthrough focuses on the mechanic loop, the decision framework behind every step, and the practical controls you need on day one. Everything below is grounded in the official store page and updated as of 2026-10-18.
Getting Started: Spawn, Controls, and Your First Egg
The first hour of Ride a Dino is mostly about learning the controls and proving that the egg-to-hatch loop actually works. Once you accept that the game does not publish dinosaur names, rarity tiers, or speed numbers, the puzzle becomes much simpler: every minute should be moving you toward your next egg, your next hatch, or your next mutation.
Controls Across Desktop, Console, Mobile, and Tablet
Ride a Dino officially supports desktop, console, mobile, and tablet, which is a wide range for a Roblox tycoon and unusually broad compared to most genre peers. Each surface maps the same core actions — mount, dismount, interact, open radial menus — but the input layer changes ergonomics: mouse-and-keyboard gives you the fastest egg-hunting loop thanks to instant E bindings and scroll-to-zoom camera control, while touch inputs force slower, more deliberate taps that suit shorter tycoon sessions. Because the tycoon economy scales with how quickly you can chain sprint-to-mount cycles, platform choice quietly dictates your dino collection pace.
| Platform | Movement | Camera | Core Actions | Best For |
|---|---|---|---|---|
| Desktop | WASD / arrow keys | Mouse look, scroll to zoom | Left click to interact, E to mount, R for radial menus | Long sessions, fast egg-hunting |
| Console | Left stick, right stick for camera | Right stick + triggers | A to mount, X to interact, bumpers for menus | Couch play, big-screen sessions |
| Mobile | Left virtual stick, tap-to-look | Drag to rotate, pinch to zoom | Tap interact, on-screen mount button | Quick sessions on the go |
| Tablet | Hybrid stick + touch camera | Drag, pinch | Tap interact, on-screen mount | Largest mobile screen, balanced input |
The single most useful habit you can build is keeping your mount button close to your movement stick. Egg hunting is a loop of sprint, mount, dismount, sprint, and any extra travel time between those beats compounds across a long session. On desktop, that means binding E to something comfortable rather than reaching. On mobile, it means thumbing the on-screen mount button without looking down.
What the Game Actually Tells You to Do
The official store page states the loop in five lines: explore the map to uncover concealed dino eggs, hatch dinos that come out quicker and rarer than the last, ride a swifter mount to open eggs tucked further out, mutate to boost speed even more, and collect rare dinos to build out your collection. That sentence is the entire design intent. It also explains why the controls feel like a tycoon despite the dinosaur theme: the camera, mount, and interact inputs are all built to keep the cycle short and readable.
A practical first-hour checklist distills the five-line store-page loop into steps you can execute before any mutation slots fill up or you wander too far from spawn, because the first hour is when the egg-locating indicator and your mount speed compound the most — every decision in this window is a multiplier on hatch count, and the dinos you ride out of the gate determine which rarity tier you can realistically reach before the map's harder eggs get contested.
-
Walk the spawn area and learn where the UI tells you your current mount, hatch count, and mutation slots.
-
Open the egg-locating indicator as soon as it is available. Without it, you are searching the entire map.
-
Hatch your first dino as soon as you can afford it, even if the rarity is unremarkable. A slow mount is still a mount.
-
Ride the dino back out to the nearest egg you can see, then look for the next one from the higher vantage.
-
Save mutation attempts for after your second or third hatch, not your first.
That checklist is intentionally short because every extra step it adds becomes a liability the moment the egg-locating indicator, mutation slots, and mount-speed multipliers start stacking against the player's reading time. The five-line store-page loop is the source of truth: explore, hatch, ride faster, mutate, collect, and any checklist item that strays outside that cycle — like detouring for cosmetics, off-route scouting, or hoarding mutation attempts for a "perfect" hatch — will end up contradicting the official mechanics and slowing the same loop the controls were built to optimize, which is why the first hour reads as a tycoon despite the dinosaur skin.
The Loop From Egg to Mount
The Ride a Dino tutorial does not explain the loop as cleanly as the official description does, so it helps to break the cycle into the four phases that actually drive progression. Every session, no matter how long, runs through the same four phases in the same order.
Phase 1: Explore the Map for Hidden Dino Eggs
Exploration is the discovery half of the loop, and the only phase where the game gives you a free win. Eggs are placed in fixed locations on the map, and the official description says explicitly that you find them by exploring. There is no published drop rate and no published egg list, so the strategy is to cover as much map as possible in as little time as possible, with whatever mount you currently have.
The fastest way to do that is to pick a direction at spawn, run in a straight line to the map edge, then sweep back along a parallel line. Because eggs tend to sit in less obvious terrain rather than along obvious roads, do not be afraid to deviate from your line when the camera catches a glint or a tucked-away alcove. The community reports that the egg-density hotspots tend to be slightly off the main path, but since the developer has not published a map, treat every session as fresh scouting.
Phase 2: hatch dinos that come out quicker and rarer than the last
Hatching is the conversion half of the loop. You trade an egg for a dinosaur, and the dinosaur you receive has a speed value and a rarity value, both of which are described only as "better" compared to what you had. The official store page does not publish a species list, a rarity tier list, a hatch cost, or a hatch time, so the safest framing is: each new hatch should be evaluated against the dinosaur you are currently riding, not against a published best-in-class.
The practical decision rule is to keep hatching as long as each new dinosaur meaningfully improves your speed, your rarity, or both. When the game hands you a hatch that feels like a side-grade rather than an upgrade, the next egg becomes more valuable than rolling again on your current mount. This is also the point where mutation starts to matter, because a side-grade hatch with a strong mutation can outperform a slightly rarer hatch with no mutation.
Phase 3: ride a swifter mount to open eggs tucked further out
The mounting phase is what gives the loop its name. The official description names riding as the activity that lets you "reach harder-to-find eggs," which is the only concrete advantage the developer publishes. The translation is straightforward: a faster mount lets you cover more ground per minute, which means more eggs per session, which means more hatches, which means more chances to mutate and collect.
In practical terms, riding is a quality-of-life multiplier rather than a one-time unlock. Mounting lets you skip terrain, dodge dead ends, and recover quickly from a wrong turn. If you are playing with friends, mounting is also what lets you split the map and meet back at a rendezvous point without losing time. The walkthrough treats riding as the moment in the loop where speed, which has been an abstract number the whole time, becomes a concrete travel time.
Phase 4: Mutate and Collect Rare Dinos
Mutation and collection are the long-tail half of the loop. The official description says mutation "boosts your speed even more" and that collection is about building a roster of rare dinos, but the developer has not published mutation names, reroll mechanics, or a published rarity tier list. The honest way to read this is that mutation is a multiplier on top of an already-hatched dino, while collection is the slow accretion of the rare hatches you have earned over many sessions.
Because the game has no published mutation system, the only safe rule is to spend mutations deliberately. A mutation attempt on a side-grade hatch is a wasted attempt, while a mutation attempt on a noticeably faster or rarer hatch is the highest-leverage moment in the loop. If you want a deeper breakdown of how mutation interacts with rarity and how to think about rerolls, the mutation tips guide walks through the decision framework in more detail.
Tips, Strategies, and the Infinite Radar Game Pass
The official store page documents exactly one game pass, Infinite Radar, which is described as "a radar you can use forever" that "always finds the nearest egg." There are no developer products and no badges, and the developer has not published a redeem-code system, so anything that looks like a code list is not from this game. With that as the only formal purchase on the table, the rest of progression comes from how you run the loop.
| Purchase channel | What it actually sells | In-game cost basis | Reliability for finding hidden Dino Eggs | What it does NOT give you |
|---|---|---|---|---|
| Infinite Radar (productId 3716208223) | One permanent radar that "always finds the nearest egg" | Robux game-pass price not published by developer (treated as variable) | Always-locks the nearest hidden Dino Egg on the map at all times, including harder-to-find eggs reachable only with better-speed dinosaurs | No hatch odds, no rarity tier, no mutation slot, no stat boost to the dinosaur you ride |
| Developer Products | None — 0 published | n/a | n/a | No consumable radar, no mutation reroll token, no hatch booster |
| Badges | 0 published | n/a | n/a | No badge-gated Infinite Radar, no second radar tier, no cosmetic trail |
| Redeem codes | 0 — no code system exists | n/a | n/a | No code list; any "Ride a Dino code" page is not from this game |
Strategy Framework: A Decision Tree, Not a Checklist
The biggest mistake new riders make is treating the loop as a checklist rather than a decision tree. The store page names the activities, not the order, and the order that maximizes progress per minute shifts based on your current mount, your mutation slots, and the eggs you can currently reach.
| Current Situation | Best Next Move | Why |
|---|---|---|
| Slow mount, no mutation slots | Hunt the nearest egg and hatch | Speed multiplier is your biggest unlock |
| Decent mount, empty mutation slot | Push for one more rare hatch, then mutate | Multipliers stack on top of better base stats |
| Fast mount, mutation slots full | Collect and explore far zones | Riding speed now matters more than hatching |
| Side-grade hatch with mutation available | Mutate before hatching again | Avoid wasting mutation on a weaker base |
| All slots used, all eggs reachable | Reset sweep and look for hidden eggs | Coverage of the map is the only remaining input |
That decision tree is intentionally generic, because the developer has not published the speed or rarity numbers that would let you quantify each branch. It still works as a heuristic because every branch points at the next activity the official description names, in roughly the same priority the description implies.
When Infinite Radar Is Worth the Robux
Infinite Radar is the only documented game pass for Ride a Dino, and its description is unusually direct. A radar that always finds the nearest egg removes the entire exploration phase from your session, which is a meaningful saving because exploration is the phase that scales worst with server population. In a full 6-player server, six riders all sweeping the same map means each rider finds fewer eggs per minute, and a radar that points you to the nearest egg shortens that competition.
For free-to-play players, the radar is a quality-of-life purchase rather than a power unlock, because hatching, mutation, and collection are not gated behind it. For players who intend to play many long sessions, the radar is the most direct way to convert session time into hatch count. Players who only intend to drop in occasionally will get more value out of a slow, deliberate sweep of the map.
Tips and Tricks From the Community
The community has converged on a small set of habits that consistently show up in player reports, even though the developer has not confirmed any of them in writing. None of them require a paid pass, and all of them respect the fact that the game does not publish a species or rarity list.
-
Keep one mutation slot reserved for a clearly better hatch. Burning a slot on a side-grade is the most common way players stall their progression.
-
After every mutation attempt, treat the resulting dino as a fresh mount and rerun the decision tree above, because the right next step changes when the underlying numbers change.
-
On a private server, the egg-sweep is faster, but the lack of competition also means the loop is shorter and the long-tail value of collection matters less.
-
On a public server, the egg-sweep is slower, and the radar value of Infinite Radar is correspondingly higher.
-
If you are playing the game for the first time and want a gentler onboarding, the beginner guide for new riders walks through the same loop with extra detail on the first hour.
Mistakes the Walkthrough Steers Around
Most early-game stall in Ride a Dino comes from a small set of repeated mistakes, and recognizing them in advance is the single biggest upgrade a new player can make. None of these pitfalls are bugs; they are all rational responses to a sparse-information game where the developer has not published a species list, a rarity tier list, or a mutation roster.
Pitfall 1: Treating the Game as a Species Collection
Because the store page mentions "rare dinos," it is tempting to assume the game is a collectible roster with a published bestiary. It is not. The developer has not published any dinosaur species, which means any list you find elsewhere almost certainly belongs to a similarly named but different Roblox experience. The walkthrough treats "collect" as a long-tail side activity rather than the main progression path, which keeps the focus on the loop.
Pitfall 2: Saving Mutation Attempts Forever
The official description says mutation boosts speed even more, but it does not say how often you can mutate or what the reroll cost is. The community has reported that sitting on full mutation slots waiting for a "perfect" moment tends to backfire, because the loop's value comes from the next hatch, not from hoarding the existing one. Spending a mutation on a clearly upgraded hatch almost always beats sitting on a full bar.
Pitfall 3: Ignoring the Mounting Phase
New riders sometimes treat the mount as cosmetic, especially when the underlying dinosaur feels like a side-grade. The official description is explicit: riding faster dinos is what lets you reach harder-to-find eggs. Even a modest speed upgrade is a real upgrade, because every minute saved on travel becomes a minute spent on the next hatch, the next mutation, or the next collect.
Pitfall 4: Looking for Codes and External Wikis
The developer has not published a code system, and the game's only official channels are the Roblox page for Ride a Dino and the Dino Riders! developer community. Any third-party wiki that lists dinosaur names, rarity tiers, or codes for this game is almost certainly documenting a similarly named title. The walkthrough is built only on the official description, which is why it does not name a single species, tier, or mutation.
Pitfall 5: Burning Time on Pre-Mutation Exploration
The decision tree above deliberately puts exploration last in the priority order for most players, because the value of exploration scales with mount speed. A fast mount with empty mutation slots is more valuable than a slow mount with full mutation slots, because the fast mount turns future exploration into faster sweeps. Until you have a clear upgrade in hand, treat exploration as a side activity rather than the main event.
Ride a Dino on Different Platforms and With Friends
Ride a Dino officially supports desktop, console, mobile, and tablet, with a 6-player server cap. The combination of a small server size and a short loop means the multiplayer experience is more about coordination than competition, especially in the early hours.
Desktop, Console, Mobile, and Tablet Differences
On desktop, the loop feels closest to a traditional tycoon: large screen, mouse-look camera, fast keyboard movement, and the ability to bind keys for ergonomics. On console, the experience is comfortable on a TV but the camera takes a little more practice, because right-stick look and trigger-based actions are slower than mouse-driven inputs. On mobile, the screen real estate is the main constraint, and pinch-zoom plus drag-look are the camera habits to build. On tablet, you get the best of both worlds: a large enough screen for the UI and a touch-driven camera that still feels precise.
Because the control surface is the only thing that meaningfully changes, the strategy is identical across platforms. A player on mobile with a fast mount is still going to out-explore a player on desktop with a slow mount, because the mount is the multiplier that matters.
Playing With Friends and Private Servers
The 6-player server cap is small by Roblox standards, which is a feature rather than a bug for a loop-driven game. Six riders on the same map can split the sweep into parallel zones, which means each player finds eggs faster and the group collectively covers more ground per minute. The late-game multiplayer and private-server walkthrough covers coordination, rendezvous points, and how to think about server population as a long-tail variable.
A private server removes the player-vs-player competition for eggs, which makes the loop faster on a per-player basis but shorter on a per-session basis, because you exhaust the reachable eggs more quickly. The right choice depends on whether you value session length or hatch-per-minute.
Frequently Asked Questions
What is the main loop in this Ride a Dino guide?
The main loop has four phases: explore the map for hidden Dino Eggs, hatch dinos that come out quicker and rarer than the last, ride those dinos back out to reach harder-to-find eggs, and mutate to push speed further while collecting rare specimens. The official store page lists these activities in this order, and they form the backbone of the entire walkthrough. Every tip, trick, and decision in this guide serves one of the four phases.
Are there any official codes for Ride a Dino?
No. The developer has not published a code system for the experience, and the only documented purchase is the Infinite Radar game pass. Any third-party list of codes, dinosaur names, or rarity tiers almost certainly belongs to a similarly named but different Roblox experience, because the official channels for this game do not publish that data. Stick to the official Roblox page and the Dino Riders! group for verified information.
What does the Infinite Radar game pass actually do?
The official description for Infinite Radar reads, "A radar you can use forever. Always finds the nearest egg." It is a quality-of-life pass that removes the exploration phase of the loop, which is the phase that scales worst with server population. The pass is the only documented purchase, and it does not gate hatching, mutation, or collection. Players who run long sessions get the most value from it, while drop-in players can clear the loop without it.
Which platform is best for a first-time rider?
Desktop is the most comfortable platform for long sessions because mouse-look and keyboard movement let you run the egg-to-hatch loop with the lowest input overhead. Mobile and tablet are good for short sessions, while console is a strong fit for couch play. The official store page lists all four platforms as supported, and the controls map onto the same four-phase loop regardless of which one you pick. A full set of practical progression tips for new riders can help shorten the first few sessions.
Does the developer publish a dinosaur species list or rarity tiers?
No. As of 2026-10-18, the official channels for Ride a Dino do not publish a dinosaur species list, a rarity tier list, a mutation roster, or numeric speed, drop, or hatch values. The official description only states that new hatches have "better speed and rarity" and that mutation "boosts your speed even more." Any guide that names specific species, tiers, or numbers for this game is most likely documenting a different, similarly named Roblox experience, and should be treated with caution.