
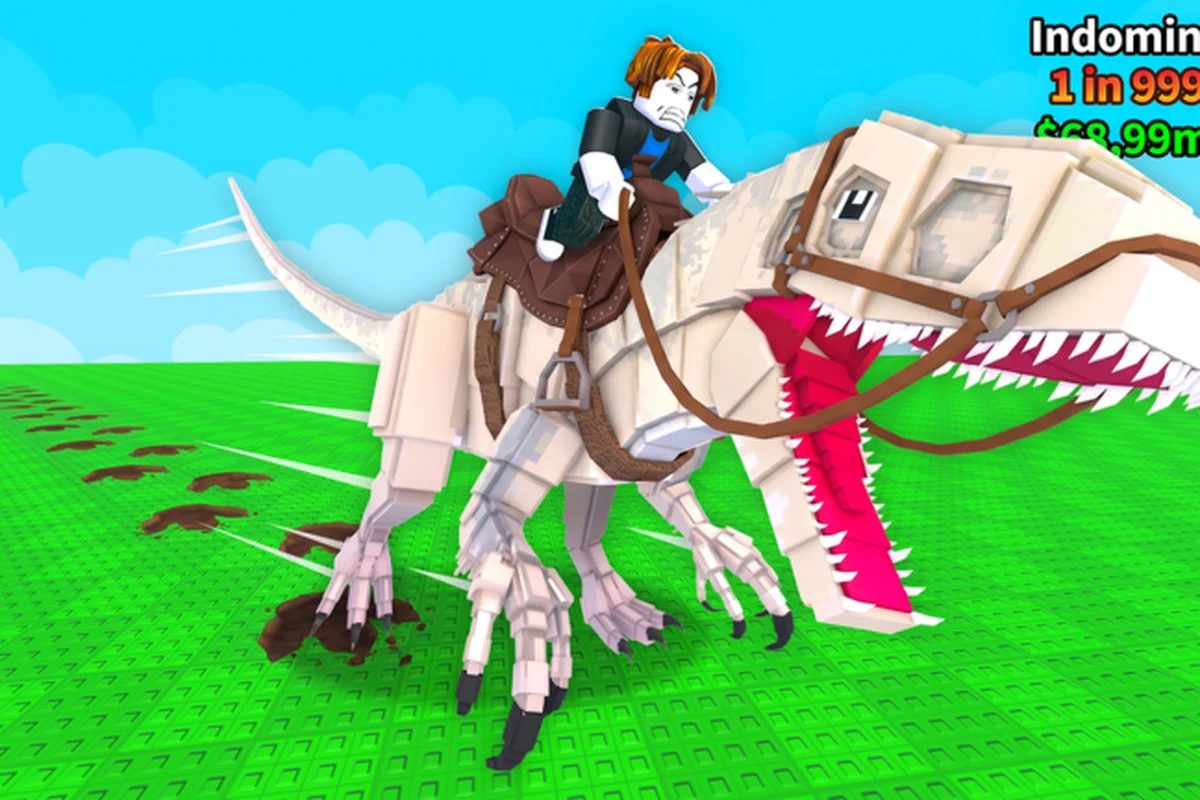
The Ride a Dino egg finder is the single most-used tool for new players because every part of the game's loop — hatch, ride, mutate, collect — starts with finding a hidden egg on the map. Knowing how the finder works, when to lean on it, and how to pair it with the right mount cuts hours of wandering into a clean, repeatable route. This guide breaks down what the in-game egg radar actually points to, how to read the nearest-egg signal, and the route decisions that fill a collection fastest without spending Robux.
How the Ride a Dino Egg Finder Works
The egg finder inside Ride a Dino is a directional pointer rather than a full minimap. The experience's only documented locator is the Infinite Radar game pass, described officially as a radar you can use forever that always finds the nearest egg: it highlights the direction of the closest unclaimed Dino Egg relative to your current mount's position. Because the pointer tells you where to go rather than carrying you there, your dino's speed still governs how quickly you act on it — a slow starter mount forces long rides between readings, while a faster mount lets the same pointer feed a much tighter route.
The official game page on Roblox describes the loop as roaming the map to uncover concealed dino eggs, then hatching dinos that hatch swifter and rarer, riding those swifter mounts to unlock eggs further out, and mutating them to push speed even further before collecting rare dinos to build out a collection. The egg finder sits at the very front of that loop, and because the base experience documents no locator of its own, the Infinite Radar is the only tool the developer has actually put a description on. The full mechanic chain is laid out on the official Ride a Dino page, which is also the cleanest authority for what the tool is meant to do.
What the Pointer Tells You and What It Does Not
The official wording is narrow enough to be worth restating: the radar finds the nearest egg. It does not rank eggs, does not reveal rarity, and does not tell you what will hatch. That single word "nearest" is the source of most early confusion, because players naturally assume the tool is pointing at something valuable when it is only pointing at something close.
| Thing the Radar Does | Thing the Radar Does Not Do |
|---|---|
| Shows the direction of the nearest unclaimed egg | Does not rank eggs by rarity or value |
| Updates as you move across the map | Does not guarantee the egg is easy to reach over terrain |
| Works continuously, per the official description | Does not change what hatches from any egg |
| Removes the search phase of an egg run | Does not make your mount any faster |
Once you internalize that split, the radar stops being a puzzle and becomes a simple way to decide where to ride next. The value is in the removal of guesswork, not in any boost to the eggs themselves.
Base Experience Versus Infinite Radar
The base experience gives you the map, your eyes, and the hidden shells themselves; the paid pass adds the nearest-egg pointer on top. That is the whole difference, and framing it that way keeps the buying decision honest — you are paying for information about direction, not for power.
| Feature | Base Experience | Infinite Radar Pass |
|---|---|---|
| Direction to nearest egg | You search the map yourself | The radar points you toward it |
| Rarity or value of the egg | Not shown | Not shown |
| Effect on hatch results | None | None |
| Cost | Free | Paid (developer-set price) |
| Best for | Players who enjoy the search | Players who want the search removed |
For a deeper breakdown of the gamepass side of the equation, the radar game pass guide walks through what Infinite Radar changes about the egg-hunting loop, why route runners pair it with the fastest rideable dino, and where simply playing free still gets you to the same eggs without spending.
Reading the Nearest Egg Signal on the Map
The Ride a Dino egg radar always points to the closest unclaimed egg, not the rarest. That distinction is the most common source of confusion for new players. Following the pointer on the starting area usually sends you to a near-spawn shell, which is exactly what the game wants you to find first. As your collection grows, the nearest egg is sometimes a farther-out shell simply because the close ones are already collected, but the radar itself does not filter by rarity.
The pointer's usefulness depends on three things: how fast your mount travels, whether terrain stands between you and the egg, and whether another player has already opened that egg in the current server. Shells that have been opened during a server's lifetime are no longer the nearest unclaimed target, which is one reason route runners treat the radar as a soft guide rather than a strict checklist — the reading is always current, and current is not the same as valuable.
Working With Server Respawning
Eggs in Ride a Dino reappear on a schedule the developer has not officially published, and no official document describes a respawn interval for any area of the map. Community players report that shells tend to come back while you keep playing rather than staying gone for the whole session, but the timing is not documented and can change between updates. Treat any interval you hear as approximate, and use the radar to confirm a reading rather than to plan a tight loop around it.
| Area of the Map | Typical Respawn Feel | Radar Usefulness After an Open |
|---|---|---|
| Near-spawn area | Fastest in practice, per community reports | High — the pointer usually finds another target quickly |
| Mid-map area | Moderate | Medium — the pointer may send you to a different shell until yours returns |
| Far, hard-to-reach area | Slowest | Lower — the pointer often targets something else first |
For a tour of how shells are spread across the map, the Ride a Dino egg locations guide maps the world into a clean route list you can ride in order. For example, that guide flags near-spawn shells as the fastest respawning targets — ideal for a quick egg run — while far, hard-to-reach stops are listed last, since they are more likely to be picked over by other riders and may need a second pass with the radar to confirm.
When the Pointer Sends You Somewhere Unhelpful
There are three recurring situations where the nearest-egg reading leads you somewhere frustrating. First, another player on a faster mount has just opened the egg you were riding toward, so the reading has already moved on. Second, your mount is on the wrong side of a wall or elevation ridge; the pointer shows direction but not path, so a straight-line run can run into geometry. Third, the shell it names sits in a hard-to-reach pocket that costs more travel than it is worth on your current mount. In all three cases, the fix is the same: ride a few seconds in a new direction, take a fresh reading, and re-decide.
Building a Fast Hatch Route Around the Finder
The fastest hatch routes in Ride a Dino chain three decisions: which mount to ride, which area to start in, and in what order to clear nearby shells. A good route has the rider spending more time moving and less time deciding where to go. The radar should feel like a passenger telling you "this way," not a puzzle you stare at between eggs.
Start every session on your fastest available mount, even if that mount is mid-rarity. Speed reduces travel time between shells and makes each radar reading more valuable, which compounds across a thirty-minute session. Next, pick a starting area — the near-spawn area is the natural choice for new players because the shells there are easiest to reach and refresh often, while deeper areas are better once you have a mount that can clear the distance. Finally, sweep each area in a wide arc so you pass multiple potential shell points before doubling back, which lets the radar retarget as each egg is collected.
Sample 30-Minute Route
| Phase | Time | Action | Radar State |
|---|---|---|---|
| Warm-up | 0–5 min | Spawn, mount fastest available dino, take a first reading | Points to nearest unclaimed shell |
| First sweep | 5–15 min | Arc the near-spawn area, collecting 4–6 shells | Retargets as each shell is opened |
| Transition | 15–18 min | Ride toward the mid-map area, take a fresh reading | Shifts to the first mid-map shell |
| Mid run | 18–25 min | Clear the mid-map area in a figure-eight pattern | Tracks 3–5 shells in that band |
| Cool-down | 25–30 min | Return toward the near-spawn area for respawns | Re-targets shells that reappeared |
A version of this loop tuned for first-egg priority is laid out in the egg track guide, which focuses specifically on chaining shells for the fastest possible first clear. That guide skips the 5–15 min sweep and instead routes the mount directly to whichever shell the radar first names. The trade-off is fewer total eggs per 30-minute run, so riders building a collection or chasing a particular hatch should weigh speed against volume before committing to the track variant.
Why Mount Speed Compounds
Every minute saved between shells is a minute you can spend opening the next egg, and the mutation system is designed to make speed gains feel meaningful. The official loop states that riding faster dinos lets you reach harder-to-find eggs, which means a single mutation upgrade can open a section of the map that was previously off your practical route. A mount that feels merely adequate near spawn can become the difference between a short session and a productive one out in the mid-map band.
Mutate, Collect, and Grow the Collection
The collection in Ride a Dino is the long-term scoreboard. Every shell you find, hatch, and add to your stable is logged there, and the official loop names collecting rare dinos as the final step, which is why route efficiency matters — more eggs per session means a deeper collection, which means access to better mounts, which means faster travel to the next shell. That flywheel is the entire endgame.
The hatch moment is short but worth paying attention to. Because the developer names no species, no tiers, and no mutation types, the hatch itself is your only in-the-moment feedback on whether the route is paying off — you see what came out and judge it against what you already own. There is no label to read and no rarity name to look up, so the comparison is entirely between the dinosaur in front of you and the ones already in your collection.
Collection Strategy by Depth
| Collection Depth | Mount Quality | Route Length | Session Goal |
|---|---|---|---|
| 0–5 eggs | Starter | Near-spawn area only | Learn the loop, fill first slots |
| 6–15 eggs | Mid | Near-spawn plus mid-map | Build a broader stable of candidates |
| 16–30 eggs | Mid, plus first mutation | Near-spawn plus mid-map | Push into harder shells with a faster mount |
| 30+ eggs | Several mutations | All reachable areas | Sustained route running |
When to Stop Chasing the Pointer
The radar is a great servant and a poor master. If your mount is not fast enough for the area the pointer names, the ride there will eat more time than the egg is worth. A practical rule: if the reading sends you far from where you started the session, clear the local area first and only then commit to the long trip on a faster mount. The loop is forgiving because the radar always tracks the nearest egg — there is no penalty for skipping a distant reading and coming back later on a better mount.
For a complete picture of the wider egg-to-hatch pipeline, the Ride a Dino egg guide picks up where the finder leaves off — covering the four-step hatch cycle, what the developer does and does not say about rarity (better rarity is mentioned, but no tier is ever named), and the criteria for deciding which egg is worth prioritizing over a closer pointer when the radar hands you a difficult choice.
Smart Trade-Offs: Grind vs. Game Pass
The decision to buy Infinite Radar is the only real-money choice in the experience, and it deserves a clear-eyed look. The pass keeps the nearest-egg pointer available, which is most valuable for players who run long sessions and treat the route like a loop. For short sessions, playing without it is entirely viable, and many players never buy it at all.
A useful framework is to measure how much of your session goes into searching rather than hatching. If you spend most of your time already knowing where to ride, the pass will not change much. If you repeatedly find yourself moving across the map without a target, the pass addresses exactly that gap. The should I buy the game pass guide walks through the decision in more detail and helps you settle it before spending.
Decision Snapshot
| Playstyle | Sessions/Week | Average Length | Recommended Choice |
|---|---|---|---|
| Casual | 1–3 | 5–15 min | Play free — the route is short enough |
| Regular | 3–7 | 15–30 min | Play free, consider the pass if searching frustrates you |
| Route runner | 7+ | 30–60 min | Infinite Radar is worth considering |
| Completion-focused | Daily | 30+ min | Infinite Radar removes the most dead time for you |
Putting It All Together
The Ride a Dino egg finder is a small tool with an outsized impact on how the game feels. Once you understand that it points to the nearest unclaimed egg rather than the rarest, that its value is information rather than power, and that Infinite Radar is the only documented locator the developer sells, the entire loop becomes easier to plan. Ride your fastest mount, sweep areas in arcs, take a fresh reading after each egg, and lean on your collection to track progress.
Because the game is still being updated — the most recent recorded update was 2026-10-12, about a month after launch on 2026-09-18 — expect egg placement and route pacing to drift. Anything that names specific species, rarity tiers, mutations, or numeric values is almost certainly from a different, similarly-named experience, since as of 2026-10-18 the developer has not published any of those. Stick to the documented loop, treat the finder as a directional guide, and the collection will fill itself.
Frequently Asked Questions
Does the Ride a Dino egg finder point to the rarest egg?
No. The official description says the radar always finds the nearest egg, not the best one. Farther-out shells become the nearest target only as your collection fills and the close ones are already collected. The game itself has not published any rarity tier names, so rarity is judged from what hatches rather than from any label the tool shows you.
How does the Infinite Radar game pass change the egg radar?
It is the locator itself — the experience documents no other one. The official listing describes Infinite Radar as a radar you can use forever that always finds the nearest egg, and it is the only documented game pass. It tells you direction and nothing else, so it is best valued by players whose sessions are dominated by searching.
How do I open eggs in Ride a Dino?
Riding close enough to a hidden shell lets you interact with it, after which the hatch plays and a new dinosaur joins your stable. The developer publishes no interaction range, so treat the visual proximity of the shell as your signal. A faster dino covers the distance to each shell more quickly, which is why speed still matters with the radar pointing the way.
How long does the hatch take in Ride a Dino?
The official page publishes no hatch time, so any specific number is unverified. What is documented is that hatching produces a dinosaur with its own speed and rarity, and that it happens as an interaction at the shell. Judge it in your own session rather than against a figure, because the developer has never attached a duration to the step.
Is the Ride a Dino collection shared across servers?
Your collection belongs to your account and carries between sessions, while the shells on the map are part of each server. That is why long route sessions feel productive — you are finding new shells each run rather than collecting the same ones. Riders who join fresh servers can cover more ground than players who stay in a single crowded instance.